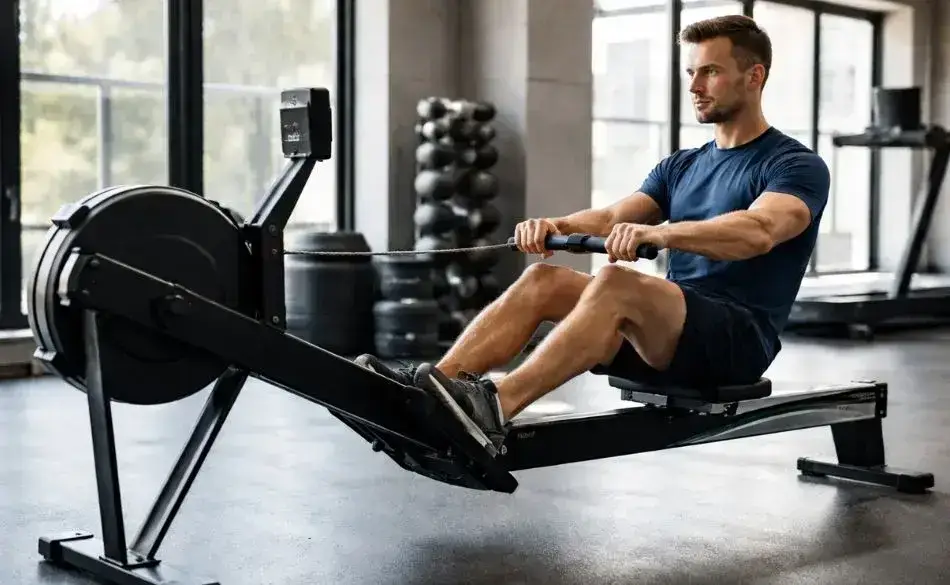
What Exactly Is the Helms Row?
The Helms Row is a chest-supported variation of the row that uses an incline bench to stabilize your torso. Unlike a traditional bent-over row, where your lower back does most of the work to hold you steady, this setup takes stress off the spine and shifts the focus entirely to the lats, rhomboids, trapezius, and posterior deltoids.
Here’s the thing about rows: many lifters struggle to truly isolate the upper back muscles because they’re worried about balance or their lower back giving out first. The Helms Row removes that distraction. You plant your chest on the bench, grab a pair of dumbbells (or even a barbell), and row with full control through a longer range of motion.
I first introduced this movement to one of my athletes who’d been frustrated with constant lower back strain during barbell rows. Within weeks, he felt a stronger contraction in his lats and finally noticed his back thickness improving without pain holding him back.
So what sets this apart from other rows?
- Better muscle activation: The chest support makes it easier to lock in and squeeze your latissimus dorsi.
- Lower back friendly: By taking spinal loading out of the equation, you can focus on pure pulling strength.
- Progression-friendly: You can go heavier or higher rep without worrying about form breakdown.
Think of the Helms Row like a safety net, it lets you push harder on your pulling muscles while protecting the structures that often fail first. If you’ve been stuck in a rut with standard dumbbell rows, this supportive rowing variation might be the exact change you need.
If you don’t have access to an incline bench or prefer more controlled alternatives, check out the Top Machines for Back Exercises: Full Gym Guide to explore back-friendly equipment that complements rowing movements.


How to Perform the Helms Row with Proper Form
Like any exercise, the Helms Row only delivers results if you perform it correctly. Proper form ensures that the upper back muscles do the work while protecting your spine and shoulders. The setup is simple but requires attention to detail.
Start by setting an incline bench at about 30–45 degrees. Lie face down with your chest firmly against the pad, feet planted on the ground for balance. Hold a pair of dumbbells with a neutral grip—palms facing each other. From here, pull the weights toward your ribcage, squeezing your lats and rhomboids at the top, then lower them slowly with control. Keep your chest glued to the bench throughout the movement.
- Set the bench – Adjust an incline bench to roughly 30–45 degrees. This angle provides the best balance between stability and range of motion.
- Position yourself – Lie face down with your chest pressed firmly into the bench pad. Plant your feet flat on the floor to create a stable base and keep your core tight.
- Grip the weights – Hold a pair of dumbbells with a neutral grip (palms facing each other). Let your arms hang straight down under your shoulders.
- Start the pull – Begin the movement by driving your elbows backward, not upward. Imagine your hands as hooks and your elbows as the real movers. This cue helps you engage the latissimus dorsi instead of relying on the arms.
- Squeeze at the top – Row the dumbbells until they reach the side of your ribcage. At the top, squeeze your shoulder blades together and hold for one second. You should feel strong contraction in your rhomboids and posterior deltoids.
- Lower with control – Slowly extend your arms back to the starting position. Focus on resisting gravity on the way down. This eccentric phase is where a lot of strength and muscle growth happens.
- Repeat for reps – Perform the desired number of repetitions without letting your chest lift off the bench. Quality of movement is more important than the amount of weight you use.
Following this step-by-step approach ensures that the Helms Row remains one of the most effective isolation exercises for back development. Mastering these details will help you build strength safely and create lasting improvements in both posture and pulling power.
When I introduced this movement to a triathlete I coach, her issue wasn’t strength but posture. Her shoulders tended to roll forward. After a few weeks of practicing the Helms Row with deliberate control, her posterior deltoids and trapezius caught up, and her posture improved dramatically. Both in training and daily life.
Here are some insider tips that help my athletes master the movement:
- Think about driving your elbows back rather than just pulling the weight up. This helps engage the latissimus dorsi more effectively.
- Pause at the top for one second to feel the contraction in your upper back.
- Avoid bouncing the dumbbells off the ground between reps—this kills tension on the target muscles.
- Control the lowering phase. Eccentric control builds more strength and muscle than rushing.
The goal isn’t to move the heaviest dumbbells in the gym, it’s to create constant tension and build strength safely. Once you lock in the form, you’ll quickly feel why this exercise is known as one of the best isolation exercises for the back.


Common Mistakes to Avoid with the Helms Row
Even though the Helms Row is designed to be more lower back friendly, there are still common errors that can rob you of results or even lead to discomfort. Fixing these mistakes ensures that your latissimus dorsi, rhomboids, and trapezius are doing the work they should be, rather than letting other muscles take over.
Here are the biggest pitfalls to watch for:
- Lifting the chest off the bench – This instantly turns the Helms Row into a hybrid row, reintroducing spinal strain. Keep your torso glued to the incline bench at all times.
- Using momentum – Swinging the weights makes it easier but shifts focus away from the upper back muscles. Smooth, controlled reps are non-negotiable.
- Half reps – Not pulling all the way up or not lowering fully cuts short your range of motion. Full contraction and stretch are what drive results.
- Wrong grip choice – A grip that’s too wide or too narrow limits muscle activation. A neutral grip (palms facing) typically works best for lats and traps.
- Neglecting the squeeze – Rushing through the movement without pausing means the rhomboids and rear delts don’t get full recruitment. Hold for a beat at the top.
A useful way to check your form is to video yourself from the side. If you notice your chest lifting, your arms moving faster than your back, or the dumbbells bouncing at the bottom, you’ll know it’s time to reset. Even a small correction in posture or tempo can completely change how much you feel the exercise in your back.


Helms Row vs Other Rowing Variations
The Helms Row is often compared to other popular rowing movements like the Pendlay Row, barbell row, and dumbbell row. Each variation has unique strengths and weaknesses, and understanding them helps you decide which is best for your goals. While barbell and Pendlay rows allow for heavy loading, they also place greater stress on the spine. The chest-supported nature of the Helms Row makes it more lower back friendly while still delivering great back development.
👉 Swipe to view full table
| Exercise | Main Benefit | Muscles Targeted | Drawbacks | Best For |
|---|---|---|---|---|
| Barbell Row | Heavy loading, full-body pulling strength | Lats, rhomboids, trapezius, erector spinae | High spinal stress, form breakdown under fatigue | Building raw back power |
| Pendlay Row | Explosive pulling power from dead stop | Lats, posterior chain, posterior deltoids | Demands perfect technique, taxing on lower back | Athletes wanting speed and power |
| Dumbbell Row | Unilateral strength, balance correction | Lats, traps, biceps | Stability issues, harder to overload progressively | Correcting imbalances, general hypertrophy |
| Helms Row | Pure back isolation, lower back friendly | Latissimus dorsi, rhomboids, trapezius, posterior deltoids | Requires bench setup, slightly reduced max load | Safe hypertrophy, posture improvement, longevity |
Think of the Helms Row as the middle ground, it gives you much of the strength and mass-building benefit of traditional rows while protecting you from the pitfalls of spinal fatigue. That’s why I recommend it not just for beginners, but also for seasoned athletes who want sustainable back growth.


Programming the Row Into Your Training
Adding the Helms Row into your program depends on your training goals and current experience level. Because it’s a chest-supported row, it can be used in strength, hypertrophy, or even rehab-focused routines. The key is matching sets, reps, and intensity with what you want to achieve.
Here are some sample ways to program it:
- For Strength: 3–4 sets of 5–7 reps with heavier dumbbells or a barbell. Focus on full range of motion and controlled lowering.
- For Muscle Growth: 4–5 sets of 8–12 reps, pausing at the top to squeeze your latissimus dorsi and rhomboids.
- For Endurance: 3–4 sets of 15–20 reps with lighter weights, emphasizing perfect form and constant tension.
Because the Helms Row is lower back friendly, you can program it more frequently than barbell rows. Many of my athletes perform it twice per week. Once on a heavy day with lower reps, and again on an accessory day with higher reps for volume. This blend builds strength and hypertrophy without beating up the spine.
Here’s a structured example for different training levels:
👉 Swipe to view full table
| Level | Sets x Reps | Rest Between Sets | Focus Area |
|---|---|---|---|
| Beginner | 3 x 8–10 reps Tempo: 2–1–2 (down–pause–up) |
90 seconds RPE 6–7 / ~60–70% 1RM |
Learn proper form, activate lats cues: chest glued to bench, elbows drive back, neutral wrists frequency: 1–2×/week • progression: add 1–2 reps before weight |
| Intermediate | 4 x 10–12 reps Tempo: 2–2–2 with 1s squeeze |
60–75 seconds RPE 7–8 / ~65–75% 1RM |
Hypertrophy and mid-back development cues: pause at top, scapulae together, full range of motion frequency: 2×/week • progression: +2.5–5% load when all sets hit 12 |
| Advanced | 5–6 x 6–8 reps (heavy) Optional last set: rest-pause |
2 minutes RPE 8–9 / ~75–85% 1RM |
Max strength and back thickness cues: strict torso, controlled eccentric (3s), explosive but smooth pull frequency: 1–2×/week • progression: double progression (reps → load) |
| Accessory Use | 2–3 x 15–20 reps Tempo: 2–1–3, constant tension |
45–60 seconds RPE 6–7 / ~50–60% 1RM |
Extra volume, posture, and endurance cues: continuous motion, minimal bottom rest, steady breathing frequency: add after heavy pulls • progression: shorten rest or add reps |
Strengthening your core can make a big difference in holding the proper form during rows. This guide to the Seal Walk Exercise offers simple moves to boost stability and posture.


Why the Helms Row Is a Must for Long-Term Back Training
When building a strong, balanced back, it’s not just about what works in the short term. It’s about what you can sustain for years. The Helms Row stands out because it gives you the benefits of rowing without piling extra strain on the lower spine. For lifters who already perform heavy deadlifts, squats, or barbell rows, this chest-supported option provides all the pulling benefits while sparing the muscles that are often overworked.
Another reason this exercise matters long-term is its impact on posture. By strengthening the rhomboids, trapezius, and posterior deltoids, it helps pull the shoulders back into alignment. This makes it not only a performance exercise but also a tool for daily life. Many athletes notice that their standing and sitting posture improve after consistently adding the Helms Row to their routine.
The move also scales easily. Beginners can start with light dumbbells and focus on control, while advanced lifters can use heavier weights, barbells, or even add tempo variations for intensity. Unlike some exercises that quickly plateau, the Helms Row offers a long runway of progression. You can build strength, hypertrophy, or muscular endurance simply by adjusting reps, sets, or rest.
In the bigger picture of training longevity, this is where the Helms Row shines. It allows you to push your upper back muscles to their limits without constantly testing your lower back’s resilience. That balance makes it one of the smartest choices for athletes who want to keep progressing year after year without setbacks.
If you’ve ever wondered what exercise can complement heavy compounds while still driving growth, the Helms Row is your answer. It protects what often breaks down first and strengthens the muscles that make the biggest difference in both performance and posture.
After a heavy back-focused session, it’s wise to take a few minutes to unwind those muscles. A simple routine like their post-workout back stretching guide helps reduce tension, improve spinal mobility, and speed recovery.

Helms Row Variations to Try
Once you’ve mastered the standard Helms Row, you can explore variations to keep your training fresh and continue making progress. Each version targets the upper back muscles slightly differently, giving you new ways to challenge strength, stability, and control.
The Dumbbell Helms Row is the most common and accessible. Using a pair of dumbbells allows for a neutral grip, which feels natural on the shoulders and places strong emphasis on the latissimus dorsi. For many lifters, this is the perfect starting point because it reinforces proper form while allowing enough freedom of movement to adjust the path of the pull.
The Barbell Helms Row increases loading potential. With both hands fixed on the bar, you can move heavier weights than with dumbbells. This version builds more overall thickness in the trapezius and rhomboids, but it requires more shoulder stability since the grip can’t rotate naturally. If you choose this variation, keep your chest firmly against the incline bench to prevent momentum from sneaking in.
Another useful option is the Single-Arm Helms Row. This allows you to focus on one side at a time, making it easier to correct strength imbalances. It also enhances the mind-muscle connection, since you can really concentrate on driving the elbow back and squeezing the lats. Many athletes find this variation helps even out differences between their dominant and non-dominant sides.
Finally, advanced lifters sometimes add tempo work. Slowing the eccentric phase to three or four seconds increases time under tension, while holding the top position for a pause builds stronger contractions in the mid-back. These tweaks don’t require extra equipment, but they can transform how the exercise feels.
Exploring these variations not only prevents your workouts from feeling repetitive but also ensures that you’re hitting the posterior deltoids, traps, and lats from multiple angles. That kind of variety is what keeps back training effective and exciting over the long haul.
If you’re looking for other back-friendly options using minimal equipment, their article on dumbbell back exercises offers smart variations that enhance posture, stability, and pulling performance.

The Pros and Cons
Like every exercise, the Helms Row has its strengths and limitations. Understanding both sides helps you decide how it fits best into your training plan. While it’s praised for being lower back friendly and excellent for isolating the upper back muscles, there are some trade-offs worth noting.
The biggest advantage is how much it minimizes stress on the lower back. With your chest supported on an incline bench, the spinal erectors don’t fatigue as quickly, letting the latissimus dorsi, rhomboids, and trapezius do most of the work. This makes it especially valuable for athletes who already perform heavy compounds like deadlifts or squats. It also provides a more consistent range of motion, since you can’t cheat with hip drive or momentum.
Another clear benefit is versatility. You can perform the movement with dumbbells, a barbell, or even cables if equipment is limited. Adjusting grip, tempo, or load changes the emphasis slightly, making it adaptable for strength, hypertrophy, or endurance training. For long-term programming, this adaptability is hard to beat.
On the flip side, the Helms Row does come with limitations. Because you’re supported on a bench, you can’t move as much total weight as you might in a traditional barbell row. Some lifters also find setup inconvenient, especially in crowded gyms where incline benches and free weights are in high demand. Finally, while it’s excellent for isolating the back, it doesn’t train spinal stability the way unsupported rows do, so it’s best seen as a complement rather than a complete replacement.
When weighing these pros and cons, the Helms Row emerges as a smart, joint-friendly tool. It won’t replace every row variation, but it fills a unique gap by letting you train the posterior deltoids, traps, and lats effectively without draining your lower back. For lifters seeking both performance and longevity, that balance makes it worth keeping in rotation.


Why the Helms Row Deserves a Spot in Your Training
The Helms Row might not have the same spotlight as deadlifts or pull-ups, but it’s one of the smartest ways to build a stronger, healthier back. By removing unnecessary strain on the lower spine, it allows your latissimus dorsi, rhomboids, trapezius, and posterior deltoids to work harder and grow without interruption. Whether you’re chasing strength, muscle size, or simply better posture, this exercise delivers lasting results.
What makes it stand out isn’t just muscle growth, it’s longevity. You can train the upper back muscles with intensity while protecting your body from overuse. Over time, that balance means fewer setbacks, more consistent progress, and a back that not only looks powerful but also supports you in daily life. If you’ve ever felt held back by fatigue or discomfort during rows, this chest-supported variation could be the missing link.
Now the question is: how will you use it? Will you start with the dumbbell version to master form, or challenge yourself with heavier barbell sets once you’re confident? No matter your path, the Helms Row offers something valuable for every level of lifter.