


Find Your Next Cycling Race
Ready to put your training to the test? Here are some upcoming cycling events matched to this article.
 Coach Graeme

Last updated:
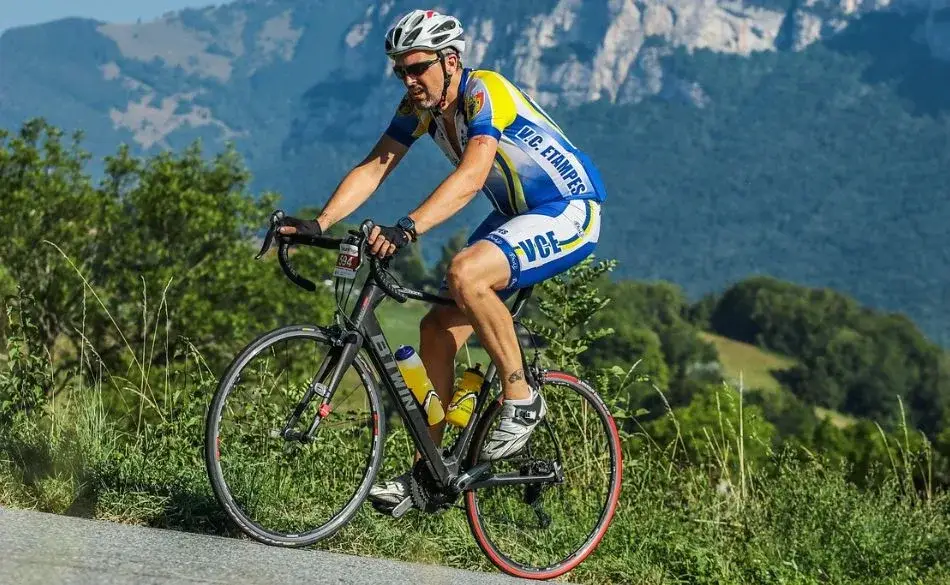
Cycling is one of the most accessible ways to build fitness. It's low-impact enough to ride most days without the joint stress of running, you can go as easy or as hard as your fitness allows, and the progress from first ride to confident cyclist happens faster than most beginners expect. The early decisions — bike type, fit, gear — matter more than training specifics at this stage, and getting them right determines whether cycling becomes something you stick with or something you try twice and abandon.
This guide covers everything a new cyclist needs: choosing the right bike, the essential gear (and what you don't need yet), bike fit basics, how to structure your first rides, and the most common beginner mistakes to avoid.
Not sure where to start with training?
Tell us your goal and schedule, and we’ll give you clear direction.
No obligation. Quick, practical advice.
Explore our cycling training resources for more helpful articles and resources.
Cycling’s defining advantage over most other cardio-based exercise is that it is non-weight-bearing: the saddle and pedals support the body’s weight, meaning the joints — particularly the knees, hips, and ankles — are under significantly less impact stress than during running or other forms of exercise that involve repeated ground contact. This makes cycling accessible to people returning from injury, managing joint pain, carrying extra weight, or simply wanting a second sport that doesn’t add to the impact load from running. The cardiovascular, muscular, and metabolic benefits are comparable to running at equivalent intensity; the recovery demand per hour of exercise is generally lower.
Cycling also scales across an enormous range of goals: commuting to work, weekend leisure rides, sportive events and gran fondos, club riding, and eventually racing if that appeals. You don’t need to define your long-term goals to start — but having a rough sense of what you want from cycling helps choose the right bike from the beginning.
The single most important early decision. Buying the wrong type of bike for your intended use is the most common reason people stop cycling — an aggressive race bike for someone who wants comfortable leisure rides, or a mountain bike for someone who plans to commute on roads, both create unnecessary difficulty that undermines motivation.
| Bike type | Best for | Position | Tyres |
|---|---|---|---|
| Hybrid bike | Commuting, leisure, fitness — the best all-round beginner choice for non-racing goals | Upright, comfortable | Medium width, versatile |
| Endurance road bike | Fitness, sportives, longer road rides — more forgiving geometry than a race bike | Slightly forward but comfortable | Narrow (28–32mm), tarmac |
| Gravel bike | Road and light off-road riding — versatile, growing in popularity | Moderate, relaxed | Wider (35–50mm), mixed terrain |
| Mountain bike (hardtail) | Off-road trails, rough terrain, technical riding | Upright, controlled | Wide (2"+), knobby |
| E-bike | Commuting with assist, hilly terrain, returning to cycling after a long gap | Varies by style | Varies |
For most beginners: a hybrid bike or endurance road bike is the right starting point. Hybrid bikes are forgiving, comfortable, and work for commuting and leisure without commitment to a specific cycling identity. Endurance road bikes are the better choice if road cycling fitness is the clear goal — they offer more efficient riding than a hybrid while being substantially more comfortable than a race-geometry road bike.
On budget: aim for at least $600–800 AUD from a reputable cycling brand (Trek, Giant, Specialized, Cannondale, Merida) rather than a lower-price department store bike. The difference in ride quality, component reliability, and maintenance cost is significant. A cheaper bike can be harder to ride, more likely to develop problems, and less enjoyable — which undermines the motivation to keep riding. A used bike from a reputable brand is often better value than a new department store bike at the same price.
Visit a bike shop: test riding before buying matters. What feels good in a photograph may feel wrong in person. A good local bike shop will size you correctly, let you test the ride, and adjust the fit before you leave.
Cycling has a reputation for requiring expensive equipment. This is true at the high end but completely unnecessary for getting started. The essential minimum is short: a helmet, padded shorts, lights, and basic repair supplies. Everything else can wait until you’re riding regularly and know what you actually need.
Helmet — the only item with zero flexibility. A helmet that meets safety standards (EN1078 in Australia and Europe; CPSC in the US) provides adequate protection; spending more buys lighter weight and better ventilation, not meaningfully more protection. Virginia Tech publishes independent helmet safety ratings that are a useful free resource for comparing options. Make sure the helmet fits correctly: level on the head, two finger widths above the eyebrows, with the chin strap fitting snugly below the chin.
Padded cycling shorts — more impactful on ride comfort than any saddle upgrade. The chamois (built-in pad) distributes pressure and reduces friction in a way that no amount of saddle padding replicates. Wear chamois shorts without underwear — the extra seam causes friction. Bib shorts (with shoulder straps) stay in place better than waist-band shorts on longer rides. For commuting in normal clothes, chamois liners worn under regular shorts achieve a similar effect.
Front and rear lights — legally required in Australia when riding in limited visibility. White light front, red light rear. USB rechargeable lights are the most practical option. Even for daytime riding, a rear flashing light substantially increases visibility to drivers.
Pump — a track pump (floor pump with pressure gauge) for home is essential for maintaining correct tyre pressure. A portable CO2 inflator or small hand pump lives in a jersey pocket or saddle bag for mid-ride flat repairs.
Spare inner tube and tyre levers — flat tyres happen. Carrying a spare tube and knowing how to change it (a 5-minute skill worth learning before your first ride) means a puncture is a minor inconvenience rather than a ruined ride.
Water bottle and cage — standard bottle cages mount to the frame with two bolts (a 4mm hex key is all that’s needed). Staying hydrated on rides over 45 minutes makes a meaningful difference to how you feel.
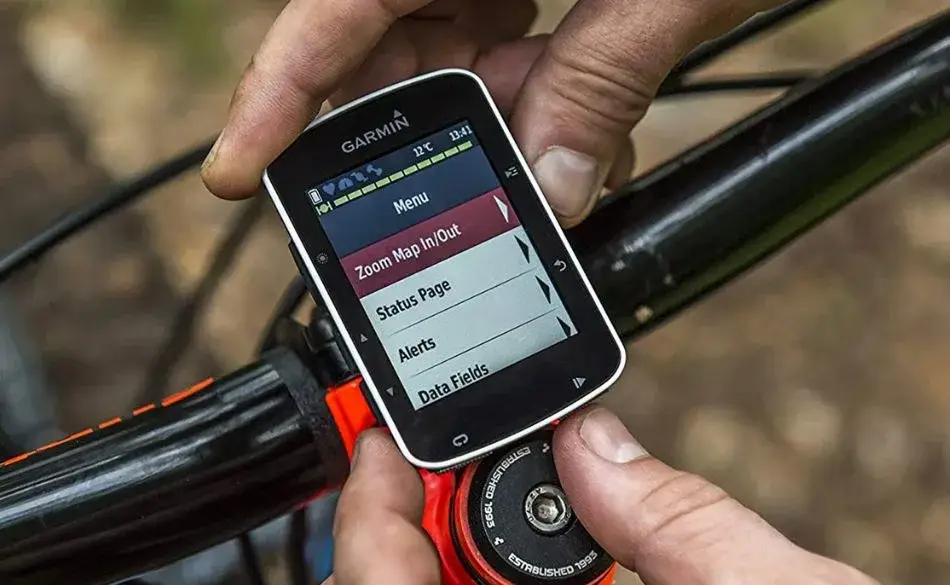
Not immediately needed: cycling shoes and clipless pedals (worth adding after a few months; improves efficiency but is a skill to learn), GPS cycling computer (a phone holder works fine to start), power meter (much later if racing or serious training).
Fit — the relationship between the rider’s body and the bike — is the most underappreciated element of comfortable, efficient cycling. Poor fit causes pain (knees, back, neck, hands) and inefficiency that training alone can’t resolve. Getting the basic adjustments right at the start prevents problems developing over weeks of riding in the wrong position.
Saddle height is the most important and most commonly wrong adjustment. New cyclists typically set the saddle too low — it feels more stable and controllable, but it causes knee pain and reduces power output. Correct height: at full pedal extension (crank at the bottom of the stroke), the knee should have a slight bend of approximately 25–35 degrees, with the heel on the pedal meaning the leg is almost straight. When riding normally with the ball of the foot on the pedal, the knee will be at the correct angle. You should not be able to keep both feet flat on the ground when seated — you should be on the tips of the toes or step off entirely when stopped.
Saddle fore-aft position affects knee tracking and power application. A rough starting point: with the cranks horizontal (3 o’clock position), the knee of the forward leg should be approximately directly above the pedal axle.
Handlebar height for beginners: err toward higher bars rather than lower. Lower bars create a more aerodynamic but more demanding position for the core and hip flexors. Building up to a lower position over months as core strength and flexibility develop is far more comfortable than starting low and being unable to maintain it.
Professional bike fit is worth doing after 4–6 weeks of regular riding, when you have enough saddle time to identify what’s uncomfortable. A bike fitter can assess position comprehensively and make adjustments that a basic setup can’t. For anyone planning to ride significant distances regularly, a proper fit is one of the best investments available.
The first few weeks of cycling are not about fitness — they’re about adaptation. The body needs time to adjust to the cycling position, the saddle, and the specific muscle recruitment pattern of pedalling. Most beginners feel disproportionately tired and sore in the first two weeks, then notice a significant improvement in comfort and effort by weeks three and four. This is normal and expected.
Week 1–2: Three rides of 20–30 minutes each. Flat or gently rolling terrain. Easy pace — you should be able to hold a full conversation throughout. Focus is on getting comfortable on the bike, practising gear changes, and learning the feel of braking and cornering. Don’t try to go fast; don’t try to keep up with faster riders. The goal is enjoyment and familiarity.
Week 3–4: Three rides of 30–45 minutes each. Introduce some gentle hills. Still primarily easy effort. By this point, saddle soreness should be diminishing. Start paying attention to cadence — aim for 70–90 pedal revolutions per minute (RPM), which is a brisk, comfortable spinning pace. Most beginners naturally ride at 50–60 RPM by mashing big gears slowly; higher cadence is more efficient and easier on the knees.
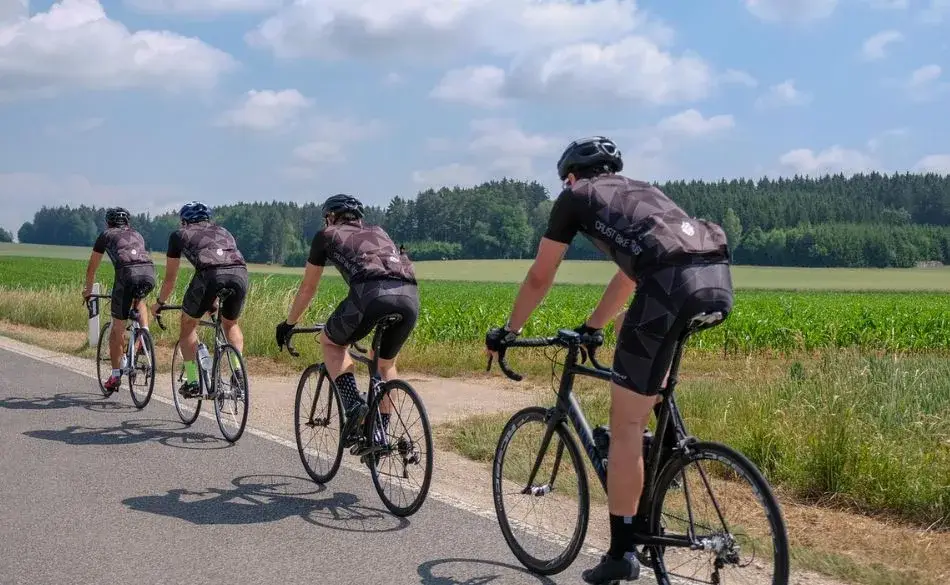
Week 5–8: Three to four rides per week, 45–75 minutes each. One of these can be slightly harder — a route with more climbing, or a segment ridden with slightly more effort. The other rides remain easy. This 80/20 approach — mostly easy, occasionally harder — is how professional cyclists train and how recreational cyclists build fitness most effectively without burning out. Our cycling power zone calculator and heart rate zone guide cover how to structure effort levels as you become more familiar with training by intensity.
On cadence: using gears correctly makes cycling significantly easier. Shift to a lower gear (easier) before you reach a hill — not halfway up it when you’re already struggling. The goal is to keep pedalling at the same comfortable cadence regardless of gradient; the gear does the adjusting, not your legs. Grinding a big gear at low cadence is hard on the knees and slower than spinning a lighter gear at higher RPM. BikeRadar recommends “anticipating big hills by shifting into a low gear just before you need it.”
Road safety for cyclists comes down to visibility, predictability, and following the same road rules as any vehicle. Drivers can only anticipate your movements if your behaviour is consistent and readable.
Road position: ride approximately 0.5–1 metre from the edge of the road or kerb — not in the gutter. This position makes you more visible to drivers, avoids the debris that accumulates at road edges, and gives you space to manoeuvre around hazards. In Australian traffic law, cyclists have the same rights and responsibilities as other vehicles on the road.
Be predictable: ride in straight lines, don’t weave between parked cars, and signal your intentions clearly using hand signals before turning or stopping. Sudden movements are the primary cause of cyclist-vehicle incidents.
Be visible: use front and rear lights even during daylight hours on busier roads. Bright cycling clothing is more effective than reflective clothing during the day. At night, both are important.
Check brakes before every ride: squeeze both brake levers and ensure the bike stops firmly with both. A quick pre-ride check of tyres (pressure and obvious damage), brakes, and quick-releases takes 60 seconds and prevents preventable failures.
Tyre pressure: incorrect tyre pressure is one of the most common beginner maintenance oversights. Under-inflated tyres feel sluggish, increase rolling resistance, and risk pinch flats. Over-inflated tyres reduce grip and comfort. Check the tyre sidewall for the recommended pressure range — approximately 80–100 PSI for road bikes, 50–70 PSI for hybrids, and 25–35 PSI for mountain bikes.
Saddle too low. The single most common setup error. If both feet can rest flat on the ground when seated, the saddle is too low for efficient pedalling. Raise it until the leg is nearly straight at full extension with the heel on the pedal.
Grinding big gears. Beginners often ride in gears that are too large, producing a slow, heavy pedal stroke. Use the gears to maintain a comfortable cadence of 70–90 RPM, shifting earlier and more frequently than feels natural at first.
Going too hard too soon. The cardiovascular system adapts faster than tendons, soft tissue, and the skin accustomed to saddle contact. Riding hard every session in the first month leads to overuse pain and discouragement. Most riding should feel easy — sustainable for the full duration without breathing hard.
Neglecting chain maintenance. A clean, lubricated chain makes shifting smoother, protects the drivetrain, and extends the life of every component. Clean and lube the chain every 150–200km or after any wet rides. A dry, squeaking chain is both inefficient and expensive in the long run.
Skipping fuelling on longer rides. On rides over 60–75 minutes, the body needs carbohydrates to maintain energy levels. A banana, energy bar, or gel every 45 minutes on longer efforts prevents the energy crash (“bonk”) that catches many new cyclists on their first longer ride.
Buying gear before knowing what you need. New cyclists often purchase a full wardrobe of cycling-specific clothing, accessories, and gadgets before they know their riding style, preferences, and goals. Start with the essential minimum and add items only once you know exactly what would improve your riding.
After two to three months of regular riding, most cyclists are ready to set a first goal — a sportive, a charity ride, a distance milestone, or a cycling event. Having a specific event on the calendar transforms occasional rides into purposeful training and provides the motivation to get out when the initial novelty has faded.
Structured training — with planned easy rides, harder efforts, and appropriate rest — produces fitness gains considerably faster than unplanned riding at whatever pace feels good on the day. Our cycling training plans cover progressive programmes for cyclists at every level, from first sportive to gran fondo preparation. For cyclists wanting to add core and strength work alongside riding — which significantly improves both performance and injury resilience — our cycling core workout guide covers the eight exercises that matter most on the bike. Runners who want to add cycling as cross-training will find specific guidance in our cycling cross-training for runners guide.
Start Cycling With a Plan That Grows With You
SportCoaching's cycling training plans and coaching take you from your first consistent weeks on the bike through to your first events and beyond — with structured progression, clear targets, and expert guidance at every stage.
What bike should a beginner cyclist buy?
Hybrid bike for commuting and leisure (most comfortable, versatile); endurance road bike for fitness and road riding goals (efficient but comfortable); gravel bike if you want to ride both road and light off-road. Visit a local bike shop to test ride before buying. Budget $600–800 AUD minimum from a reputable brand — a quality used bike beats a cheap new one at the same price.
What gear do I need to start cycling?
Essential: helmet, padded cycling shorts, front and rear lights, pump, spare inner tube and tyre levers, water bottle and cage. Everything else — cycling shoes, GPS, power meter — can be added once you’re riding consistently. Padded shorts are the highest-impact comfort purchase beyond the helmet.
How far should a beginner cyclist ride?
20–30 minutes for the first 1–2 weeks. Build to 45–60 minutes by week 4, and 60–90 minutes by week 8. Increase total weekly riding time by no more than 10–15% per week. Shorter, more frequent rides build adaptation faster than occasional long ones.
How do I avoid saddle soreness when starting cycling?
Padded cycling shorts (chamois without underwear) make the biggest difference. Check saddle height — too low causes rocking and friction. Soreness is normal for 1–2 weeks and typically resolves with consistent riding. If it persists beyond 3–4 weeks, a bike fit assessment will usually identify the cause.
How often should a beginner cyclist ride?
Three rides per week at easy, conversational pace. Most effort should be Zone 2 (comfortable enough to talk). Riding too hard every session is the most common reason beginners stall or develop discomfort in the first month. Consistency over weeks matters more than intensity at this stage.
Ready to put your training to the test? Here are some upcoming cycling events matched to this article.
Head Coach & Founder, SportCoaching
Graeme is the founder of SportCoaching and has coached more than 750 athletes from 20 countries, from beginners to Olympians, in cycling, running, triathlon, mountain biking, boxing, and skiing. His coaching philosophy and methods form the foundation of SportCoaching's training programs and resources.
No matter your goals, SportCoaching offers tailored training plans to suit your needs. Whether you’re preparing for a race, tackling long distances, or simply improving your fitness, our expert coaches provide structured guidance to help you reach your full potential.
Structured cycling coaching to build power, endurance, and speed.
What’s included
Browse upcoming Australian running, cycling, and triathlon events in one place. Filter by sport, check dates quickly, and plan your training around something real on the calendar.
Choose your plan to get started with personalized training plans designed to help you reach your goals.


Minna Backman
When you’re new, feedback is especially important, and Graeme is highly skilled at both analyzing numbers and understanding the importance of mental strength.