Why Shin Splints Happen and How to Fix the Root Cause
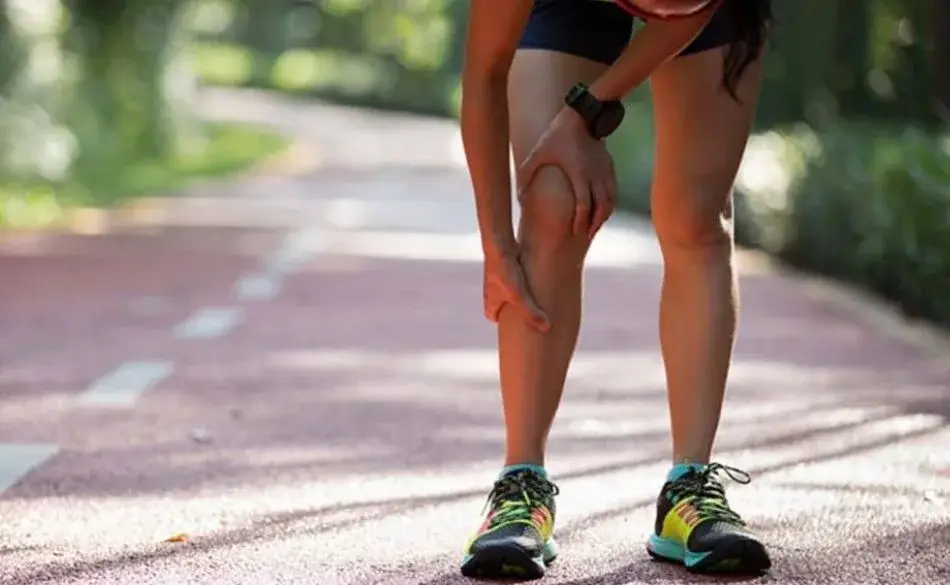
When you hear the term shin splints, it usually refers to medial tibial stress syndrome. That’s the technical name for the pain and inflammation along the shin bone. But here’s the thing, most runners don’t get shin splints because of just one mistake. They usually show up from a mix of training errors, muscle weakness, and poor recovery habits.
Think about your shin like a suspension bridge. Every stride is a car driving across it. If you suddenly double traffic without adding extra support, cracks will form. That’s what happens when you ramp up mileage too quickly or run too many hard sessions back-to-back. Your body simply can’t absorb the stress.
Another common factor is footwear. Shoes with worn-out cushioning or the wrong support for your foot type can increase impact forces. Runners with flat feet or stiff arches are especially at risk. I’ve seen athletes train for a 10K in old shoes, only to end up sidelined with shin pain after just a few weeks. The fix was as simple as upgrading to proper shoes and adding ankle mobility exercises to their routine.
Weakness in the lower legs also plays a big role. If your calves and tibialis anterior (the muscle along the front of your shin) aren’t strong enough, your shins take the brunt of every stride. That’s why incorporating toe raises, heel walks, and calf raises can make such a huge difference. These simple drills build strength where you need it most.
Prevention of shin splints isn’t just about reacting once you’re in pain. It’s about building balance, strength, and resilience before problems start. The next sections will walk you through the exact shin splint exercises and shin splints stretches that work best, so you can keep running strong without fear of setbacks.
Beating shin splints takes more than just stretches and exercises. You need a smart training plan that balances mileage, recovery, and strength work. Our Running Training Plans are designed to keep you progressing without overloading your body, helping you stay consistent and injury-free.
- Structured progression that avoids the sudden mileage jumps causing shin pain
- Built-in strength and mobility to support your calves, shins, and hips
- Options for all levels — whether you’re new to running or aiming for a PR
- Delivered within 24 hours so you can start right away
- One-time purchase with no hidden fees or subscriptions
Train smarter, reduce your risk of shin splints, and enjoy every step of your journey to the start line.
Explore Training Plans →Which Shin Splint Exercises and Stretches Actually Work?
You want relief that lasts. The fastest path is a simple plan you can repeat on busy days. Start with low load, then add strength. This keeps your shins calm while the muscles around them get stronger.
Begin with gentle motion. Light circles at the ankle, slow foot pumps, and easy toe taps wake up stiff tissue. Add short bouts of walking on grass or a track. Soft surfaces lower impact while you rebuild tolerance.
Now layer in targeted work. The front of your lower leg needs attention, not just your calves. That’s where tibialis anterior strengthening helps. When this muscle does its job, each foot strike feels lighter. Your shin bone doesn’t carry the whole load.
Balance matters too. Calves control push-off. Hips guide the line of your knee and foot. Mix in hip and calf work with ankle mobility exercises. You’ll feel smoother within two to three weeks if you stay consistent.
Stretches still have a role. Use them to ease tight spots after training, not to mask pain before a hard run. The goal is steady progress, not quick fixes. Small wins add up and support the long game of the prevention of shin splints.
Here’s a simple flow you can repeat three to four days per week. Keep the moves slow. Breathe. If pain spikes, back off and shorten the range.
- Shin splints stretches: Stand facing a wall, one foot back, heel down. Hold 30–45 seconds per side. Then bend the back knee slightly to hit the deeper calf. Hold again.
- Toe raises: Lean your back on a wall, feet 20–30 cm forward. Lift toes up, pause, lower with control. 2–3 sets of 10–15.
- Heel walks: Walk on heels for 20–30 metres. Rest and repeat 2–3 times.
- Calf raises: Rise up slowly, pause at the top, lower for three counts. Start double-leg, progress to single-leg. 2–3 sets of 8–12.
- Ankle rocks: Kneel with one foot forward. Drive the knee over the toes without lifting the heel. 10–12 controlled reps per side.
- Foot domes: Press the ball of the big toe down and “shorten” the foot without curling toes. Hold 5 seconds. 8–10 reps.
These are the core shin splint exercises I teach first. They’re simple, quick, and easy to track. Stay patient and keep notes. Your shins will thank you.
Want to understand why the front of your shin can ache during runs? Check out this detailed guide: Why Does Your Tibialis Anterior Hurt When Running?

Strength Training That Protects Your Shins
When you think of shin splint exercises, don’t just picture small ankle drills. The truth is, your entire leg chain needs support. Strong hips, calves, and feet act like shock absorbers. Without them, your shin bone carries too much force each stride.
One athlete I coached was preparing for a marathon. She kept getting shin pain by week five of training. Instead of cutting all her mileage, we added focused strength work. Within a month, she was running long pain-free, proof that the right approach can make a real difference.
Strength training doesn’t mean heavy weights in a gym if that’s not your style. Bodyweight drills work too. The goal is to balance muscle groups so no single area takes all the stress. A few weekly sessions can keep your shins resilient.
- Single-leg calf raises: Builds calf strength and balance. Perform 2–3 sets of 8–12 each leg.
- Heel-toe walking: Alternate walking on heels, then on toes for 20 metres each. Strengthens both calves and tibialis anterior.
- Hip bridges: Lie on your back, knees bent, lift hips. Helps your hips and glutes guide proper stride mechanics.
- Step-downs: Stand on a step, slowly lower one foot to the floor, then return. Strengthens quads and stabilizers around the knee.
- Side planks with leg lift: Adds lateral hip stability, which reduces inward rolling that can stress shins.
Each of these drills ties into prevention of shin splints. They spread the workload across your legs so your shins don’t do it all. Think of it like upgrading the suspension on a car, every part works together for smoother rides.
Do these sessions two to three times a week. Keep reps controlled and stop if pain increases. Over time, you’ll notice not just fewer shin issues, but stronger, smoother running overall.
Building up to 42.2 km is no small challenge and pushing mileage too quickly is a leading cause of shin pain. Our Marathon Running Training Plan is designed to balance endurance, recovery, and strength work so you can reach race day without breaking down along the way.
- 16–20 week structured plan tailored for all levels of runners
- Gradual mileage increases to prevent shin splints and overuse injuries
- Integrated strength & mobility to support calves, hips, and shins
- Delivered via TrainingPeaks within 24 hours
- One-time payment - no subscriptions or hidden fees
Train smarter, protect your shins, and take on your marathon with confidence.
View Marathon Plan →Smarter Training Habits to Keep Shin Splints Away
Even the best shin splint exercises won’t help if your training plan pushes you past the edge. Your body thrives on gradual stress and recovery. Ramping up too fast or ignoring small warning signs is like stacking weight on a shelf until it finally cracks.
One runner I coached was aiming for his first half marathon. He added extra miles every week, proud of his progress. But within a month, the familiar ache along his shin returned. By applying the 10% rule (never increasing mileage more than about 10% each week) he was able to keep building fitness without the pain.
The surface you run on matters too. Concrete is harsh on the legs, while grass or trails soften impact. Mixing terrain keeps your shins from absorbing the same pounding day after day. Pair this with shoes that match your stride and foot shape, and you cut risk dramatically. Runners with flat feet may need more structured support, while others benefit from lighter shoes that allow natural movement.
Don’t forget recovery. Muscles repair and strengthen when you rest. Ignoring sleep, hydration, and simple post-run shin splints stretches makes the cycle of pain more likely. Stretching calves, loosening ankles, and walking barefoot on soft grass are all simple ways to reset after training.
Here’s a quick checklist to guide your habits:
- Follow the gradual mileage increase rule to avoid overload.
- Rotate running shoes every 500–800 km depending on wear.
- Switch up running surfaces to spread stress.
- Take recovery days seriously- sleep and easy walks matter.
- Do regular ankle mobility exercises to stay supple.
Training smart means listening to your body, not fighting it. When you build in these habits alongside strength and mobility work, you create a foundation for consistent running.


Mobility Drills That Make Running Feel Effortless
Strong muscles matter, but mobility is the missing link for many runners. When your ankle or hip is stiff, every stride feels a little forced. That tension shifts down the chain and often lands right at your shins. Adding ankle mobility exercises and hip drills can help restore smooth movement and reduce the stress that leads to shin splints.
A lot of runners stretch calves and hamstrings, but skip ankles altogether. The tibialis anterior muscle in front of your shin works best when the ankle can glide forward naturally. Without this freedom, your shins pick up the slack. That’s why mobility should be part of your recovery days, not just an afterthought when pain hits.
Here are a few easy drills that take just minutes but pay off big:
- Ankle rocks: From a half-kneeling position, drive your front knee over your toes while keeping the heel down. Ten slow reps per side.
- Band-assisted ankle glide: Loop a resistance band around your ankle and anchor it behind you. Step forward, bend the knee, and let the band gently pull the joint. Eight to ten controlled reps.
- Hip openers: Step into a lunge and gently press the hips forward. Add arm reach overhead to unlock tight hip flexors.
- Dynamic calf stretch: Stand on a step and let your heel drop, then push up slowly. Ten reps on each side.
These drills aren’t flashy, but they’re powerful. Do them before easy runs or on rest days. Over time, you’ll notice smoother foot strikes, quicker turnover, and less shin discomfort. Think of them as oil for the machine, keeping every part moving the way it should. Combine mobility with your shin splint exercises, and you’ll have a strong, balanced system built for long-term running success.
Running through pain without structure can hold you back. Our Half Marathon Running Training Plan helps balance mileage, strength, and recovery—so you can train hard without making shin splints worse.
- 12–16 week plan that builds mileage gradually to reduce injury risk
- 1-hour consultation to adapt training around your shin splint history
- Integrates strength and mobility work for long-term resilience
- Delivered via TrainingPeaks within 24 hours
- One-time payment: $159 AUD, no subscription or recurring fees
Train smarter, protect your shins, and run your half marathon with confidence.
View the Plan →Comparing Shin Splint Exercises for Relief and Prevention
Not all drills serve the same purpose. Some shin splint exercises focus on relief by loosening tight muscles, while others build strength to stop the problem from coming back. Seeing them side by side can help you choose the right mix for your needs.
Below is a simple table comparing the most effective shin splints stretches and strengthening moves. Use it as a guide to plan your weekly routine. Mix both categories to get the best results.
👉 Swipe to view full table
| Exercise / Stretch | Main Benefit | How Often |
|---|---|---|
| Calf Stretch Against Wall | Loosens tight calves, reduces shin stress | 30–45 sec, 2–3x per leg post-run |
| Toe Raises | Tibialis anterior strengthening for better shock absorption | 2–3 sets of 10–15, 3x per week |
| Heel Walks | Builds endurance in shin muscles | 20–30 metres, 2–3 repeats |
| Calf Raises | Improves calf strength, balances push-off | 2–3 sets of 8–12, 2–3x per week |
| Ankle Rocks | Ankle mobility exercises for smoother stride | 8–10 reps per side, daily |
The lesson here is simple: a hangover recovery run is best kept short, slow, and flexible. Treat it as an option, not a rule. If the risks feel higher than the benefits, you’re better off skipping the session.


Recovery Tools That Support Shin Splint Healing
Recovery isn’t just about rest. It’s about giving your body the right tools so it can repair and adapt. If you’re dealing with shin splints, combining shin splint exercises with recovery strategies can speed healing and keep setbacks from returning.
One of the simplest tools is ice. Applying a cold pack after a run helps calm inflammation and eases soreness along the shin bone. Compression sleeves can also make a difference by improving blood flow and reducing swelling. They’re lightweight, easy to wear, and often give runners a sense of support during recovery runs.
Massage is another underrated tool. Using a foam roller or massage stick on calves and the tibialis anterior muscle releases tight spots that pull on your shin bone. Some athletes I coach use a frozen water bottle to roll directly under the shin and calf. Cheap, simple, and surprisingly effective.
Cross-training is also part of smart recovery. Swimming, cycling, or using an elliptical lets you maintain aerobic fitness without pounding the legs. Many runners skip this, thinking time away from running is wasted. In reality, it’s what allows your shins to adapt and come back stronger.
Here are a few recovery options worth trying:
- Ice packs for 10–15 minutes post-run to reduce inflammation.
- Compression sleeves during or after training for added support.
- Foam rolling calves and front shin muscles to release tension.
- Cross-training sessions like cycling or pool running to stay fit.
- Elevating legs after long runs to encourage circulation.
Recovery doesn’t replace strength or shin splints stretches, but it works hand-in-hand with them. Think of it as the quiet background work that allows the visible progress to happen. Keep your recovery habits consistent, and your legs will reward you with smoother, pain-free runs.
Curious how compression can help ease shin pain and speed recovery? Learn more here: Compression Sleeves for Shins: A Runner’s Guide to Relief and Recovery.
If you’re tired of guessing which shin splint exercises or stretches to do—and want a plan that keeps you consistent—our Running Coaching gives you one-on-one support to balance training, recovery, and strength work so shin pain doesn’t derail your goals.
- Custom training built around you: fitness, lifestyle, and injury history
- Weekly check-ins: feedback on workouts, recovery, and form adjustments
- Technique & strength guidance: to target weak spots linked to shin pain
- Flexible schedule: virtual sessions designed to fit your routine
- No subscription lock-in: pay as you go or choose a coaching block
Run smarter, recover faster, and build the confidence to train without shin splint setbacks.
Learn About Running Coaching →
Running Form Tweaks That Protect Your Shins
Sometimes the problem isn’t just weak muscles or tight calves. The way you run can add hidden stress to your shins. Small changes to form often make a big difference when combined with shin splint exercises.
One key factor is stride length. Overstriding (landing with your foot far in front of your body) creates a braking force that shoots straight up the shin bone. Shortening your stride slightly and aiming for a midfoot strike helps spread impact more evenly.
Cadence, or steps per minute, also matters. Most recreational runners sit around 160 steps per minute. Bumping that closer to 170–180 lightens the load per stride. It’s like spreading the same weight across more rungs of a ladder. Each rung carries less stress.
Arm swing and posture play a role too. Slouching forward or swinging arms across the body can throw off balance. This often leads to excessive inward rolling of the foot, known as overpronation, which stresses the inside of the shin. Keeping your posture tall and arms driving straight forward helps the legs move in a straighter path.
Here are a few form tips to experiment with:
- Run tall: Imagine a string pulling you up from the crown of your head.
- Quick steps: Aim for a slightly faster cadence to reduce impact.
- Soft landings: Picture landing quietly, like running on grass barefoot.
- Aligned arms: Swing arms front-to-back, not across your chest.
- Eyes ahead: Looking forward keeps posture upright and stride efficient.
You don’t need to overhaul your stride overnight. Pick one change at a time and practice it during easy runs. Over weeks, these tweaks will feel natural. Combined with ankle mobility exercises and shin splints stretches, better form reduces the cycle of pain and lets you run more smoothly for years to come.
Wondering how your foot motion affects shin stress? Learn more about underpronation and its effects on your legs here: Underpronation in Runners: Causes, Fixes, and the Best Gear

When to Rest and When to Push Through
Every runner faces the tough call: should you run through shin pain or take time off? The answer depends on the severity of your symptoms and how your body responds to shin splint exercises and recovery strategies.
Mild soreness that eases as you warm up can often be managed with reduced mileage, softer surfaces, and extra shin splints stretches. In contrast, sharp pain that worsens during a run is your body waving a red flag. Ignoring it risks turning a simple case of medial tibial stress syndrome into a more serious stress fracture.
One of the athletes I coach made this mistake during a marathon buildup. He tried to “tough it out,” running hard through persistent shin pain. Within two weeks, he couldn’t run at all and needed six weeks of complete rest. After that, he learned the value of early intervention. Short breaks and targeted tibialis anterior strengthening gave him long-term consistency.
So how do you know what’s safe? Here are a few guidelines:
- If pain fades during easy runs and doesn’t return after, it’s usually manageable.
- If pain sharpens with each stride, stop and rest immediately.
- If soreness lingers for more than a day after running, reduce training load.
- If swelling, bruising, or pinpoint tenderness appears, seek medical advice.
Remember: rest doesn’t mean you’re losing fitness. You can cross-train, stretch, and strengthen while your shins recover. Short-term adjustments protect your long-term goals. By listening to your body and respecting its signals, you’ll return to running stronger and with less fear of repeat injuries.


Footwear Choices That Make or Break Shin Health
Your shoes are the first line of defense against shin splints. Even the best shin splint exercises won’t undo the damage caused by worn-out or poorly fitted shoes. Every step you take adds up, so the right footwear can mean the difference between smooth miles and painful setbacks.
Most running shoes last about 500–800 kilometers before cushioning breaks down. Past that point, impact forces hit your shins harder. Runners with flat feet often need stability shoes with stronger arch support, while those with a neutral gait may do well in lighter trainers. If you’re unsure, a gait analysis at a local store can reveal how your feet move during a stride.
Surface and shoe pairing also matter. Softer shoes work well for concrete or treadmill running, while firmer shoes can feel better on trails or grass. Rotating between two pairs of shoes spreads out wear and keeps your legs adapting in healthy ways. Think of it as giving your shins a fresh environment each run.
Custom insoles or orthotics can help runners who’ve battled recurring shin issues despite good training habits. They provide extra alignment and reduce stress on the shin bone. Combined with ankle mobility exercises and tibialis anterior strengthening, this can be a game-changer for stubborn cases.
Key tips when choosing shoes:
- Replace shoes every 500–800 km depending on wear.
- Choose shoes that match your foot type: stability for flat feet, neutral for normal arches.
- Rotate between at least two pairs to vary stress patterns.
- Pair shoes with your training surface for best shock absorption.
- Consider insoles if shin pain persists despite good habits.
Footwear isn’t just about comfort, it’s a training tool. With the right shoes, your prevention of shin splints strategy gets a huge boost. Ignore it, and even the strongest exercises may not save you from pain.
Not sure how often to swap your running shoes? Discover the signs and recommendations here: When Should You Replace Your Running Shoes?


Building a Long-Term Plan for Shin Splint Prevention
Relief is great, but the real goal is to stop shin splints from coming back. That means building a plan that mixes shin splint exercises, smart training, and good recovery into your weekly routine. Think of it like building layers of armor for your lower legs.
Start with consistency. A few minutes of toe raises, heel walks, and calf raises two to three times per week adds up over months. Pair that with regular shin splints stretches after your runs, and you’ll notice muscles staying looser and shins less tender. These little habits create long-term resilience.
Training adjustments are the next layer. Follow gradual mileage increases and avoid stacking too many hard sessions back-to-back. If you can, mix in softer surfaces and rotate shoes often. These changes may seem small, but together they reduce constant pounding on your shin bone.
Don’t forget mobility and recovery. Keep ankle mobility exercises in your warm-ups, and schedule true rest days into each week. Active recovery (like cycling or swimming) lets you maintain endurance while giving your shins a break. It’s not wasted time; it’s the foundation for sustainable training.
Here’s a simple weekly outline to guide you:
- 2–3x per week: Strength work (toe raises, calf raises, hip drills).
- After every run: Quick shin and calf stretches.
- Weekly: One recovery or cross-training day.
- Every 6–8 weeks: Rotate or replace shoes.
When you stick to a plan like this, prevention becomes second nature. You’ll stop thinking about shin pain and start focusing on your goals. Whether that’s running your first 5K or training for a marathon. The combination of strength, mobility, and smart habits is what keeps runners moving forward without fear of setbacks.