Why Saddle Sores Happen (Even If You’re Doing Everything “Right”)
Here’s the thing about saddle sores: they’re sneaky. One day your ride feels fine. The next? You’re wincing every time you sit down.
So what exactly causes them?
A saddle sore usually starts as a small area of skin irritation. Most often on your inner thigh, sit bones, or groin area. It may look like a red bump or rash, but what’s happening underneath is a mix of friction, pressure, sweat, and bacteria building up in one spot.
Research backs this up. As a scoping review found, saddle sores often stem from combined friction, moisture, bacteria, and pressure. Early treatment includes rest, hygiene, and topical creams, while more severe cases may require medical intervention such as steroids or surgery. (Source)
Here’s how it snowballs:
- Your saddle puts constant pressure on soft tissue.
- That pressure, plus sweat and heat, creates moisture and friction.
- Add bacteria from your skin or shorts and boom, you’ve got a sore.
Some riders think saddle sores only happen with cheap gear. But truth is, even the best bibs can rub if your bike fit is off or your hygiene habits slip.
You’re more likely to get a saddle sore from indoor cycling or long endurance rides. Why? Less shifting in position. Your backside stays planted, and all the pressure builds up in the same spot.
And if you’re re-wearing shorts or skipping a post-ride shower? That bacteria is just hanging out, waiting to cause trouble.
Even tiny changes in position (like moving your hips back or rotating your pelvis) can increase saddle pressure by up to 20%. If your saddle is too high or tilted forward, that pressure doubles.


The Fastest Way to Heal Saddle Sores (Without Missing Too Many Rides)
You’ve got a saddle sore. Now what?
First, don’t panic. Most of the time, saddle sores from cycling heal quickly with the right care. The trick is knowing when to rest and when you can keep riding.
Here’s how to heal smart and fast.
Start by giving your skin a break. That doesn’t mean you need to stop training altogether. But switch to indoor rides or short recovery spins with low pressure in the saddle area. If the sore is open, painful, or infected, stop riding entirely for a few days.
Now, clean the area thoroughly. Wash with warm water and a mild soap after every ride. Then apply an antibacterial cream. Something like Sudocrem or a zinc-based diaper rash cream works surprisingly well. These reduce irritation and speed up healing.
If the bump looks more like a boil or deep pimple, it might be a folliculitis or abscess. At that point, you’re not just dealing with skin rubbing, bacteria has set up shop. In that case, see your doctor. You may need a prescription antibiotic cream or even oral meds.
What Else Helps?
- Apply a warm compress 2–3 times a day
- Wear loose, breathable clothing off the bike
- Skip tight jeans, underwear seams, or anything abrasive
- Avoid shaving the area (which can cause micro-tears)
If you need to ride during healing, try standing more often in the saddle or adjusting your position every 5–10 minutes to reduce pressure.
Let’s be clear, pushing through pain usually makes things worse. Healing means dialing back and giving your skin space to recover.


Never Get One Again: Smart Habits That Prevent Saddle Sores
Here’s the truth: once you’ve had a saddle sore, you’ll do anything to avoid another.
And the good news? You can. In fact, most riders can prevent them altogether with a few simple, consistent habits.
Let’s start with the most important one – hygiene. Always wear clean cycling shorts. No exceptions. Reusing a sweaty chamois is like reusing a used tissue. It might seem fine at first, but it’s a breeding ground for bacteria. Wash your kit after every ride and skip the fabric softener (it clogs the fabric and can irritate your skin).
Next, consider investing in the best chamois cream for saddle sores. These creams reduce friction and act as a barrier against bacteria. Apply a thin layer directly to your skin or the chamois before every ride. No need to overdo it, too much can actually cause more rubbing.
Now let’s talk gear. Choose the best bike shorts to prevent saddle sores. Those with a high-quality, single-piece chamois and no major seams in the groin area. Avoid shorts that bunch, shift, or compress too tightly.
But it’s not just about the shorts. Your bike fit plays a massive role. An improper saddle height or tilt can load pressure into exactly the wrong places. Many riders unknowingly ride with saddles that are too narrow or angled forward. This pushes soft tissue directly into the saddle’s edge. A professional bike fit can solve a lot of mystery soreness.
Also, try standing out of the saddle every 10–15 minutes on long rides. This reduces pressure and gives your skin a break. Indoor riders – pay attention here. Because you move less indoors, you need to be extra diligent about shifting your position or standing periodically.
Tip: A sprinkle of talcum powder or anti-chafe powder post-shower can help reduce lingering moisture. Especially helpful in humid climates.
Building these routines might feel like extra work now. But they’re the small things that keep you riding longer and pain-free. Once they’re habit, you won’t even think twice.

Is Your Saddle Actually to Blame? Here’s How to Tell
You’ve done everything right – clean shorts, chamois cream, good hygiene. But the soreness keeps coming back. So what gives?
In many cases, it’s not you, it’s your saddle.
The wrong saddle shape, width, or tilt can make even short rides feel like punishment. And the tricky part? A bad saddle doesn’t always hurt right away. The pain shows up gradually, like a dull burn or tender spot after a few hours.
Here’s how to figure out if your saddle is the real culprit:
- Do you feel pressure right on your soft tissue or perineum?
- Is one side of your saddle more worn or frayed?
- Are your saddle sores always in the same spot?
- Do you constantly shift or fidget during a ride?
If you answered yes to any of these, it’s time to check your setup.
First, saddle width matters more than most riders realize. If it’s too narrow, your sit bones hang off the edge. That means your body weight presses into all the wrong areas. Too wide? It can rub your inner thighs raw.
Also, check the angle. A saddle tilted too far forward throws your hips into an unnatural position, increasing pressure on the front. One that’s nose-up? You’re sliding backward and straining your lower back.
A proper saddle supports your sit bones, not your soft tissue. You should feel stable but not compressed. Many bike shops offer pressure-mapping tools or demo saddles to try before you buy. Use them.
Tip: Not all saddles work with all riding styles. A saddle that feels great on road rides might feel awful during triathlon or indoor training. Match the saddle to the position you ride in most often.
The takeaway? You can’t out-ride a bad saddle. If you’ve tried everything and nothing helps, this is the upgrade worth making.
Many bike shops offer pressure‑mapping tools or demo saddles to try before you buy. Use them. You can also explore our guide to achieving precise fit with the Triathlon Bike Fit – A Complete Guide for more on alignment, angles, and comfort. This helps you refine saddle position with confidence.
Bonus Tips for Long Rides, Hot Days, and Indoor Sessions
Some rides are just tougher on your skin. Long distances, humid weather, or static indoor sessions all create the perfect storm for saddle sores, especially if you’re not prepared.
The good news? You can adapt your routine based on the ride ahead. Whether you’re heading out for a century or logging miles on the trainer, these targeted tips make all the difference.
Use the table below to find smart adjustments that match your riding conditions:
Swipe to view full table
| Ride Type | Key Risks | Targeted Prevention Tips |
|---|---|---|
| Long-Distance Outdoor |
- Extended pressure - Chamois saturation - Heat & salt buildup |
- Use best chamois cream for saddle sores - Reapply at halfway point - Shift position every 15 minutes - Stand out of saddle on climbs |
| Indoor Training |
- Minimal movement - High sweat volume - Hot environment |
- Add fan for airflow - Use anti-bacterial wipe post-ride - Try two pairs of shorts in back-to-back sessions - Shorten interval sets if needed |
| Hot & Humid Rides |
- Excess moisture - Skin softening - Increased friction |
- Apply powder post-shower - Avoid over-lubing with cream - Choose moisture-wicking fabrics - Shower immediately after riding |
| Cold Weather Rides |
- Dry skin - Over-layering - Reduced sensation |
- Warm up properly - Avoid double shorts - Use a moisture-locking balm - Stay aware of numbness or pressure |
Tip: If you’re training back-to-back days, rotate different brands of bibs. The change in chamois shape and padding can reduce repeat pressure zones, helping avoid chronic saddle spots.
Indoor training swings differently – higher sweat, less movement. To track and recover smartly, our Bike Erg Workouts Guide gives sample sessions and recovery tips to keep friction low and form consistent.

What’s the Best Chamois Cream for Saddle Sores? Here’s What Actually Works
If you’ve been cycling for more than a few weeks, chances are you’ve heard someone say: “You need chamois cream.” But here’s the thing, not all creams are the same. And using the wrong one can make things worse instead of better.
So what’s the best chamois cream for saddle sores? That depends on your skin, the ride type, and personal preference. Some riders prefer cooling menthol-based creams. Others need ultra-soothing formulas for sensitive skin. And some avoid creams entirely unless riding over two hours.
Let’s break it down:
- Menthol-based creams (like Assos or DZ Nuts): Provide a cooling sensation and light anti-bacterial protection. Great for hot rides. Can feel too intense for sensitive skin.
- Lanolin or shea butter-based creams (like Chamois Butt’r or Muc-Off): Smoother, thicker feel. Moisturizing. No burn. Ideal for dry climates or long-distance rides.
- Natural or hypoallergenic options (like Enzo’s or Gooch Guard): Fewer synthetic ingredients. Gentler for riders prone to rashes, breakouts, or itching.
For rides under an hour, you may not need cream at all. But for anything longer (especially in heat or humidity) it’s smart protection. Apply a thin layer directly to your skin or the inside of your chamois. Don’t overdo it. Too much can create clumps that chafe.
If your current cream stings, clogs your pores, or causes breakouts, switch formulas. The wrong cream is just as bad as none at all.
Just like saddles and shorts, finding the right chamois cream takes trial and error. But once you get it right, it becomes one of your most important tools in the fight against saddle sores.
Ride Pain-Free: Build a System That Works for Your Body
By now, you’ve seen it, there’s no one-size-fits-all fix for saddle sores. What works for one rider might not work for another. And that’s okay. The key is to build your own system. One that fits your body, your goals, and your style of riding.
For some, prevention starts with dialing in bike fit and investing in the right shorts. For others, it’s all about post-ride hygiene or choosing the best chamois cream for saddle sores. What matters most is consistency, not perfection.
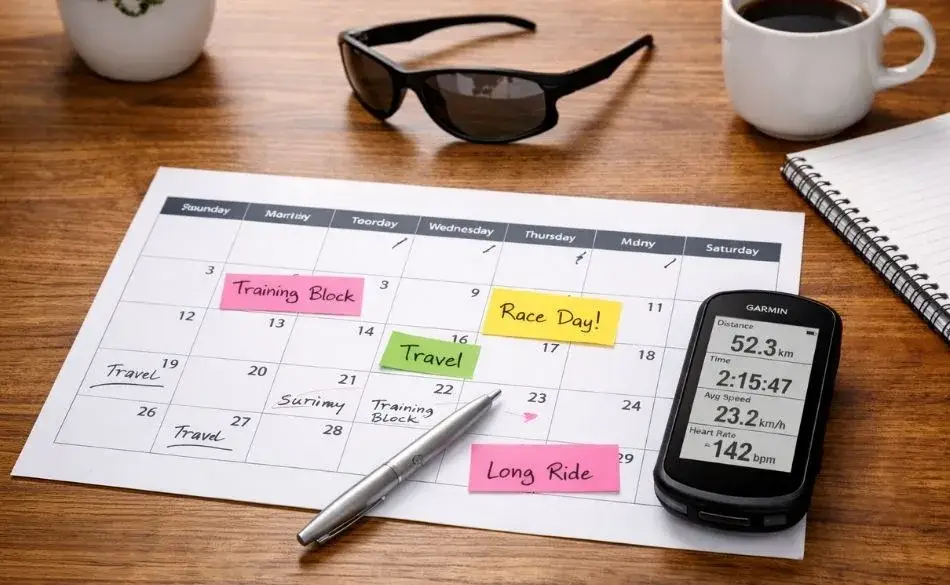
If you’re training for a big event, like a fondo or multi-day tour, don’t wait until soreness shows up. Treat your saddle care like you treat your nutrition or intervals – build it into your plan. Test different shorts on long rides. Practice applying cream in a way that doesn’t cause excess buildup. Use rest days to check your skin, rewash your gear, and make tiny adjustments.
New to cycling? Start simple:
- Wash your shorts after every ride
- Use bike saddle sore prevention cream consistently
- Adjust your saddle slowly.Just a few millimeters at a time
- Track what works in a ride journal
Experienced racer? Don’t ignore warning signs. A small rash today can become a week-long issue if pushed through. Prioritize long-term comfort over short-term mileage.
The best riders I coach are the ones who notice patterns. They know how their body reacts to heat, long hours, different bibs. Once you learn your own triggers, you’ll know how to sidestep them.
If you’re building your own system, a proper training plan can reduce injury risk and pressure-related issues. For endurance goals, check out SportCoaching’s structured Cycling Training Program. With heart‑rate and power zone guidance, it helps keep your rides balanced and skin‑friendly. If planning a big endurance ride like 100 km or a climbing event, their 100 km Cycling Training Plan or Cycling Climbing Training Plan integrate long saddle time with progressive recovery.